I looked at a lot of tutorial out there and they all want to over complicate things. So I thought I would boil the process of creating a Node.js RESTful web API service and using TypeScript as the programming language. I'm using Windows and Visual Studio 2015 for this tutorial.
First thing you need is to install Node.js of course. That's not too difficult. Go to https://nodejs.org/ and download it.
You're also going to want to make sure you have the latest version of TypeScript for Visual Studio. Go to Tools > Extensions and Updates and search for TypeScript and install it.
Another great tool for VS that is going to make your life a whole lot easier is Node.js Tools for Visual Studio. NTVS is a free, open source plugin that turns Visual Studio into a Node.js IDE. You can also install it from Extensions and Updates.
Now let's create a project for our Node.js app. Assuming you've installed NTVS you can create a new project using one of the project templates that NTVS installed. For this example I used Blank Node.js Console App project.

Now that we have our project we need to define what npm packages our app depends on. We want to use Express (http://expressjs.com/), which is a web application framework that makes it easier to handle HTTP requests and responses. It also makes it easy to insert any middleware you want in your HTTP handling pipeline, such as logging and parsing message bodies. It's a really great framework for creating web apps.
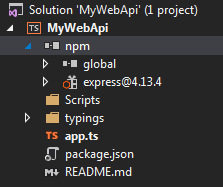
To install it right-click on the "npm" item under the project in solution explorer and select Install New npm Packages. Search for express and install it. Now you'll see it in your list of installed packages.
Next we want to get the TypeScript type definition files for Express so we have intellisense. Unfortunately I couldn't find any way to do this from inside VS, so we're going to have to go to the node command line to do that. First thing we need is a package to help manage type definitions. There is a npm package called Typings for that (https://github.com/typings/typings). Install it from the command line like so:
> npm install typings --global
Now we can use Typings to fetch type definitions for our project. So first navigate to the project folder.
> cd \lab\MyWebApi
Then install all the type defs we need. Express uses the following typings:
> typings install dt~express --global --save
> typings install dt~serve-static --global --save
> typings install dt~express-serve-static-core --global --save
> typings install dt~mime --global --save
[Update: 2016-08-15] Previously this was using the --ambient parameter. However, this is now deprecated, use --global instead. Also, you must now prefix the module names with "dt~" so it knows the source is the Definitely Typed library.
This should have added a typings folder under our project folder with all of the typings. It also created a main.d.ts file in there. That's the only file we need to add to the project, so in VS go and include that file in the project.
This should have added a typings folder under our project folder with all of the typings. It also created a main.d.ts file in there. That's the only file we need to add to the project, so in VS go and include that file in the project.
That's it for setup. We are now ready to code. Open up the app.ts file and remove anything that's already in there. Then add the following:
import express = require("express");
let app = express();
This imports the express module so that we can use it. Then we use it to create a new express app and assign it to the app variable. Now we can set up some routes for our RESTful web API service. Let's add a GET route and set the route to "/api".
app.get("/api", (req, res) =>
    {
        res.status(200).json({ message: "api GET called!" });
    });
Here we are telling our app to watch for GET requests on the path /api and run the handler function when we get one. The handler function gets two parameters, the request and the response objects. Our handler function first writes to the response an HTTP status code of 200 (OK) then tells it to return some json. Pretty simple! In a real app we would get some kind of real data, but for now we're just making sure it works.
Now we need to start the server listening for requests. For that we add:
let port = 8080;
app.listen(port, () => console.log("Listening on port " + port));
This will start the server on port 8080. When it's ready it will display the message logged from the callback function. Now we can run it and see if it works. To start the app go back to the node command prompt and enter:
> node app
You should see the message "Listening on port 8080". Now open a browser window and go to: localhost:8080/api. You should get {"message":"api GET called!"}. That's it, you now have a RESTful service running in Node.
Now we can add any of the other REST verbs we want our service to support. Express supports all of the REST verbs. For example, if we want to add a handler for POST we can add the following:
app.post("/api", (req, res) =>
    {
        res.status(200).json({ message: "api POST called!" });
    });
To test anything other than GET requests you're going to have to use a Web API testing tool like Postman (http://www.getpostman.com/). I highly recommend it for testing web APIs.
Those are the basics for creating a RESTful web API service using Node.js in Visual Studio with TypeScript. Next time I'll show how to make the web service more modular so it's easier to maintain larger services.
No comments:
Post a Comment